Form letters in Word based on an Excel spreadsheet database
Prerequisites
- The Excel spreadsheet must be in the database format.
- Field names must be in the first row
- There can be no blank rows
- Each row should contain only a single item, typically a student or a person.
- The spreadsheet must be the "first" in the Excel workbook. This means that the
spreadsheet tab must be the leftmost tab in the workbook.
The workbook that will be used in this session is named Data.xls The leftmost
spreadsheet contains imaginary students with addresses and TOEFL scores. The Code and
Campus fields are generated by IF and CHOOSE functions. The Code field also employs the
AND function to determine that the student is above 400 in each section of the TOEFL.
|
A |
B |
C |
D |
E |
F |
G |
H |
I |
J |
K |
L |
M |
N |
O |
P |
Q |
| 1 |
Seq |
HS |
First |
Last |
POB |
State |
Zip |
Sx |
St |
Lang |
Elem |
List |
Read |
Struct |
Avg |
Code |
Campus |
| 2 |
1 |
CHS |
Ama |
Elidok |
1230 |
Chuuk |
96942 |
F |
C |
Puluwatese |
Puluwat |
550 |
540 |
550 |
547 |
3 |
Natl |
| 3 |
2 |
CHS |
Kofi |
Jacob |
1240 |
Chuuk |
96942 |
M |
C |
Mortlockese |
Iras |
460 |
480 |
440 |
460 |
2 |
IEP |
Table Notes
- In row 2 the function that calculates the average is:
=AVERAGE(L2:N2)
- The function that calculates the code is:
=IF(AND(L2>=400,M2>=400,N2>=400),IF(O2>=470,3,2),1)
- The function that calculates the Campus is:
=CHOOSE(P2,F2&" State Campus","Intensive English Program at
"&F2&" State Campus","National Campus in Palikir,
Pohnpei")
Procedure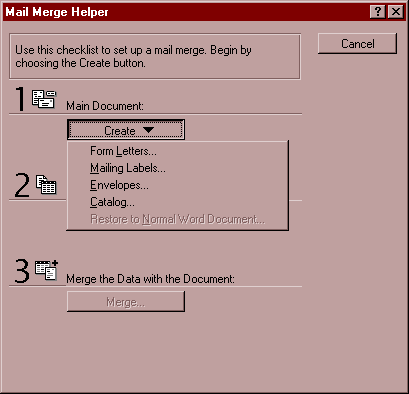
- Start by opening a Microsoft Word.
- From the Tools menu select Mail Merge.
- Click on the Create button listed under Main Document.
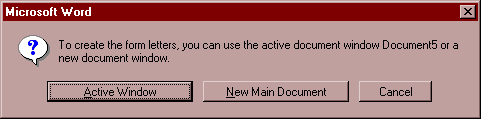
- Select Form Letters from the drop down menu.
- In the dialog box that appears select Active Window to start the form letter in the new
document.
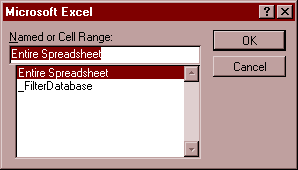
- Click on the Get Data button and choose Open Data Source from the menu that drops down
(bleow left).
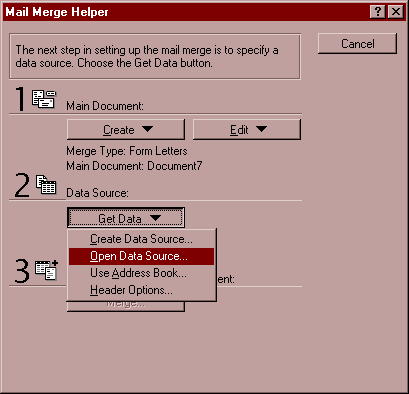
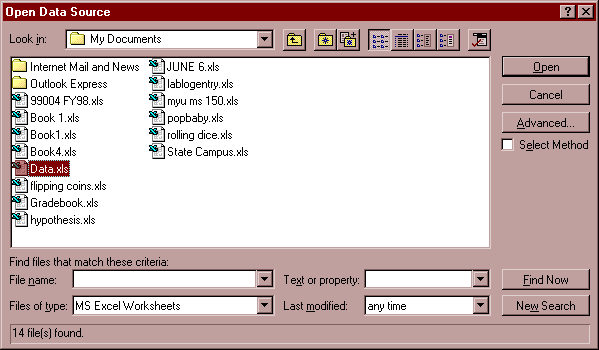
- Click on the Get Data button and choose Open Data Source from the menu that drops down.
- Set the Files of Type to MS Excel Worksheets.
- Click on the Data.xls file.
- Click on the Open button.
- Click on OK in the next dialog box.
- Choose Edit in the next dialog box.
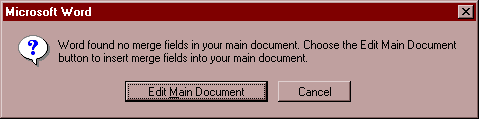
We are now ready to compose the document that will act as the template for the form
letter. Note that a new tool bar has appeared above the document ruler:

- Enter our address in the first three lines of the document:
College of Micronesia-FSM
P.O. Box 159 Kolonia
Pohnpei FM 96941-0159
- After typing in the zip code press the Enter key a couple times to move down the page.
- Click on the Insert Merge Field button to access the merge field drop down list.
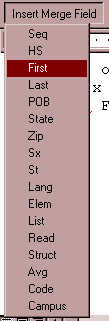
- Choose the First name field from the list. Note that the drop down menu items are the
field names in the Data.xls spreadsheet.
The result should be the appearance of: «First» in the document.
- Use the menu to add the rest of the student’s address, placing spaces and returns
as appropriate. Items in « » brackets are field names to be inserted from the Insert
Merge Field Menu. Note that the letters FM, Dear, and the final full colon were typed in.
Within the FSM the four states share the common state code FM. The result should be:
College of Micronesia-FSM
P.O. Box 159 Kolonia
Pohnpei FM 96941-0159
«First» «Last»
«POB»
«State» FM «Zip»
Dear «First» «Last»:
Continue editing the template with the addition of the following sentence:
Congratulations! You have been selected to attend the «Campus».
Sincerely,
J.J. Ofari-Awuko
Note that any field in the Excel database could be included in a form letter. A
student’s TOEFL scores could be reported back to the student.
The next step is to perform the actually "merge" of the data into the template.
- From the Tools menu select Mail Merge.
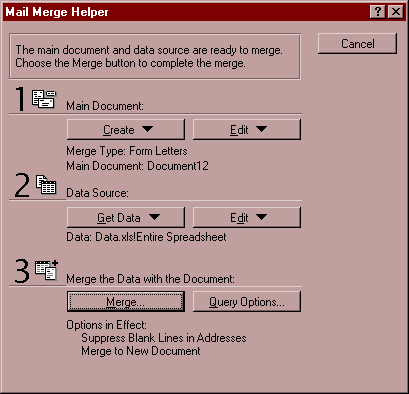
- Note that the dialog box now displays three new buttons. The Edit buttons afford one the
option of editing either the template or the database. The third new button, Query
Options, lets us filter the database. Although one can merge the whole the database, one
can also merge on filtered subset of the data. The filter has to be set from Query Options
as opposed to being set by using the Autofilter feature in Excel. For practice we will
merge only the students who are Code 3, admitted to the National Campus at Palikir.
- Click on Query Options.
- Under the word Field: use the drop down list control to select the Code field. The
Comparison field is set to equal to. This can be changed if needed. A grade book might be
filtered to produce midterm deficiency form letters for all students with a midterm
average of less than 70. For now, leave this field set to the default Equal to setting.
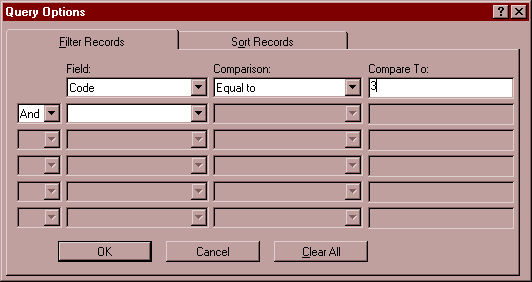
- Type the number 3 into the Compare to field that appears. This dialog box could be used
to set up any type of filter, numeric or alphabetic. If the Field is set to HS and the
Compare to field is set to CHS then form letters for only the students attending Chuuk
High School would be produced. Click on OK once the mail merge options are set.
- The main Mail Merge Helper dialog box should be open after OK’ing the Query
Options. Click on the Merge button to the left of the Query Options button in this dialog
box to see the following dialog box:
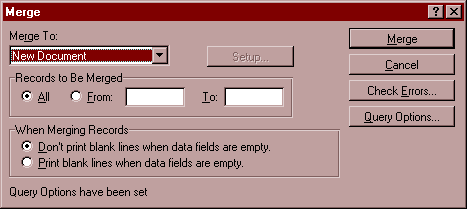
- This dialog box controls where the final merge of the data with the template. Normally
you would perform this final merge directly to a printer and thus this final step should
be taken only on a machine connected to a heavy duty printer.
You can, as we will today, opt to merge to a New Document and then save that document to a
disk, but the resulting document is often too LARGE to fit on a floppy disk. If the
document is large enough a merge to a New document could overflow the memory or hard disk.
What printers are capable of handling a mail merge? The only printers that are actually
designed for this sort of work are our largest work horses: the Hewlett Packard 4 and 5N
in the Office of Admissions and Records, and the similar machine on Norma Edwin’s
desk. I think FAO and the Business Office each also have such printers. Do NOT merge to an
ink jet printer such as the Hewlett Packard 690 or 870 series printers, they are not
designed to handle the load. Not to mention the number of ink cartridges one consume.
- In the Merge dialog box the Check Errors button accesses a dialog box that control the
error handling mode. If the merge is particularly large and will be left to run unattended
(such as overnight) these parameters will need to be set. For our small merge we will not
need to adjust these settings.
There is also the option to Merge only certain records, Records to be merged. This allows
one to merge only a single record (one student) or a set of records, say from five to ten.
Remember that one record is one row in Excel. I find this feature to be of limited
usefulness. This feature requires knowing what number the record is in the set.
Although a Sequence number column can provide information on the record number, the Query
Options can be used to enter a filter to handle the production of single records. A filter
can be set to the first name and in the second row of the filter the last name can be
entered to produce a single form letter. The most productive use of this feature is in
producing a test merge of the first two to three records to check the output before
committing to a 4000 record merge.
- Click on the Merge button with Merge To: set to New Document.
The computer will work for a few moments and then produce a new document with the data
merged into the new document.
- Choosing the Print Preview in Word should show that each section is a new page. At this
point one could print the form letters from Word.
Microsoft Access note: If the data is in Microsoft Access then at the Open Data Source
dialog box choose MS Access as the type. After selecting the desired database and clicking
on Open, a dialog box will appear that allows one to select the desired table or query.
Query Options prior to merge can also be set for an Access database.
The template with the field names should be saved. This document can be opened and
edited. The document remembers the data source.
Remember when you go to perform the merge to a printer to take with you on a floppy
disk BOTH the form template file AND the Excel or Access database!
Office 97 and 2000 User notes (Linda, Pastora, Quly, and anyone else using 97 or 2000)
One other caution: Office 97 files are not compatible with Office 95 files. Those using
Office 97 or Office 2000 and wishing to exchange documents with Office 95 users face a
host of complications. Both the Word form template and the Excel spreadsheet must be saved
in a format compatible with Microsoft Office 95.
Unfortunately the option to save in Office 95 versions from Office 97 do not always
function properly. Due either to incompetence, inattention, or sheer arrogance, the
converters to save Word 97 documents in Word 95 formats do not work properly in the early
versions of Word 97. Problems also sometimes occur when saving Excel 95 files using Excel
97. There are work-arounds. Please contact me if you are in need of making
conversions.
Sample work-around
Excel 97 documents can be saved and transferred using Excel 4.0 Workbook (not
worksheet!) format. Office 97 will kick and scream that you about lose your formatting,
your functions, your data, and your life. This is basically a lie designed to scare you.
Functions such as IF, CHOOSE, and FREQUENCY date back to version 4.0 and are preserved.
Subtotals and filter settings will be lost, but I have never lost actual data. There are
various small glitches you might encounter, such as if you save in 4.0 format with
subtotals active then the subtotals will not be automatically removeable when the document
is reopened.