Directions for using
FrontPage ExpressThis is a Microsoft Program that assists you in
making a basic webpage without using html. These directions will help you make your own
personal homepage with a background color, images, and hyperlinks to other websites. You
can print these directions out if you like. Today's homepage is going to be about Pohnpei.
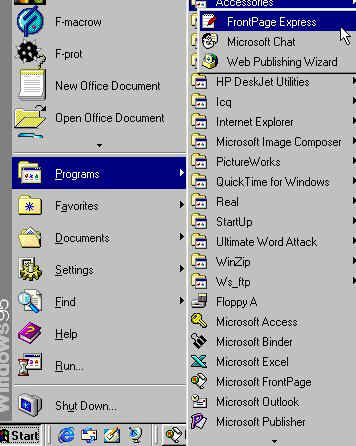
Step 1 On your computer locate the Frontpage
Express Program.
Go to Start, Programs, Internet
Explorer and then find FrontPage Express.
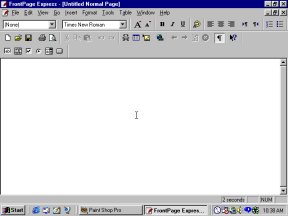
Step 2 Now you should see a screen that is blank
just like this:
Step 3 Save your new document onto your Floppy
disk. Go to File, Save As, and then give your document a title.
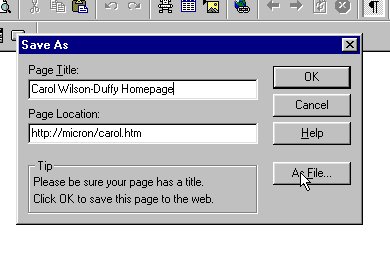
I typed in my name for the title: Carol Wilson-Duffy Homepage. Type in your name. Don't
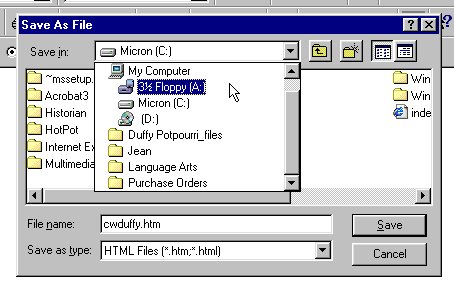
worry about the part about the page location right now. Click on the button that says "As File" then locate the Floppy A Drive.
(Click on Floppy A) Then give your file a name. Use your first initial and last name. Example:
Joe Shmoe = jshmoe.htm
Then click on Save.
Note: When you are creating your first website, the start page or Homepage must be
saved as "index.htm."
Step 4 Before we begin with all the fun stuff, we
have to set up our page so that when people look for our page on the Internet, they can
find it easily. To do this we must use the "Page Properties." So...go
to File and then Page Properties. You will see a screen like the one below.

Step 5 Click on the tab that says "Custom".
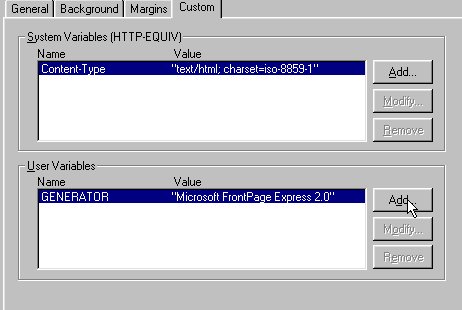
Step 6-Click on the button that says "Add" on the bottom half of the screen under User Variables.
You should see this screen:
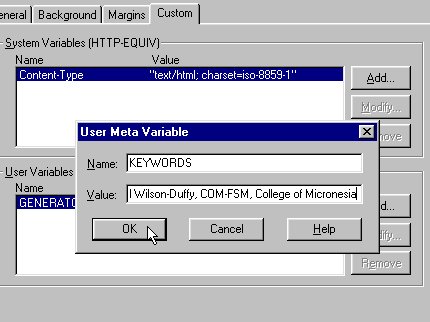
Step 7 In the box for Name type
in: KEYWORDS (all caps). In the box for Value type
in keywords that describe your page. Remember to use commas between each keywords and also
remember to type the words in carefully and use caps and small case letters correctly.
Don't put in spaces in between your keywords.
Type in: your name,COM-FSM,College of
Micronesia-FSM,Pohnpei,FSM
Step 8 Click on OK. Then
on the same page, click on the button that says "ADD"
again. You are going to add a description of your page.

Step 9 In the Name box type in the word DESCRIPTION. In the Value box type in a complete and grammatically correct
sentence that describes the page. Try to make it interesting. The more
interesting it is the more people will check out your page.
Type in: Pohnpei, the Island of Paradise!
Then click on OK. Click OK one more time and you should be back to
this page:
Step 10- Now it's time for the fun stuff:
Take a minute and look at the tool bars. They are very similar to those in the Microsoft
Word Program. The most different buttons are these ones:
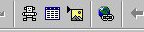
The first one is for adding advanced tools like Search and Timestamp.
The second one is for inserting a table, the yellow one is for inserting a picture and the
last one that looks the Earth with a "link" is for making a hyperlink that
will connect your page to another person's page.
Step 11 Background: Go up to the Format
menu and click on Background.

Step 12 Choose the color you want. Remember you
should try to use a light background and dark text or a dark background and light text.
Also be careful because you don't want your page so "busy" that people have a
hard time reading it. One last tip...try to keep the text one color and the links
another color. Generally if the text is a different color than black, people think it's a
hyperlink and try to click on it. I chose light blue for my background and my text
will be black. Links to other pages will be blue.
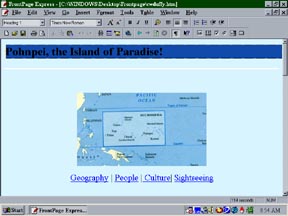
Step 13 Make a Title
Type in: Pohnpei, the Island of Paradise!
Center it.
Make it Bold
Click on Heading 1
(Hint about single spacing: click on the Shift and Enter button at the same time to have
single spacing.)
Step 14 Insert a Horizontal Line
Go to Insert. Choose Horizontal Line.
Right click on the Horizontal Line. Choose Horizontal Line Properties.
Now you are going to change the color and thickness of your line.
Choose 100 percent of the window.
Four pixels thick.
Center
White
and then Click OK>
Step 15 Time to put in a picture. (This
program is a little limited as to where you can put in an image. Let's do it the easiest
way since it's your first time.Let's put it under your title. So put your mouse underneath
the title of your page)Click on the yellow icon that I mentioned earlier. (Or you can go
to the Insert Menu and choose Image.) You should see a screen like this:
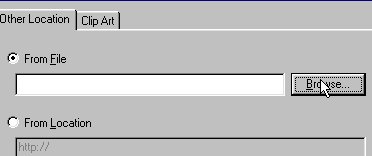
Step 16 Click on the button that says
"Browse". The only pictures or images that you can use on a webpage must be in
the ".jpg" or ".gif" format. You need to locate those pictures on the
floppy disk. Choose map.jpg Click on the file and then
click on the "Open" button.
So, you have added a background color, typed in your page title, formatted it as you
desired, and finally you added a picture.
Step 17 Marque Title
Highlight your title then go to Insert and choose Marque. Select the style of the
marque and color that you want.
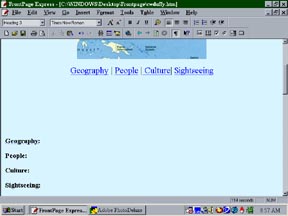
Step 18 Make a table of contents
When you view a web site all the information from the web site should be on the first
page. So under the map picture, type in: Geography | Culture| People | Sightseeing
Step 19 Make Bookmarks
When you have all your information on the same page you should create
"bookmarks" which other hyperlinks link to.
1. type in the following:
Geography
Culture
People
Sightseeing
2. Highlight the word Geography (not the one at the top) then go to Edit and choose
Bookmark, and OK.
3. Do the same for the other : Culture, People, Sightseeing
Step 20 Make a Hyperlink to a Bookmark
Now go back up to the top and find the word Geography in the table of contents. Now
highlight it and then click on the Hyperlink button (Globe/link). Choose the Open Pages
tab and then pull down on the Bookmark menu and locate the one that says Geography. Click
OK. Repeat this for the other three words in the table of contents. (Note: if your
bookmark name does not come up in the pull down menu, you will have to make sure that the
webpage file has been selected.)
Step 21 Insert more pictures
Now you are going to add pictures for the Bookmarked information:
pohmapcut.jpg should be inserted under the Bookmarked word Geography.
cwmusic.jpg under the word People.
woodcarving.jpg under the word Culture
sokehs.jpg under the word Sightseeing.
Step 22 Add information to the Bookmarked area.

In order to save time. I have information listed here that can be "plugged"into
your webpage. I am not sure if the information is exactly correct, as I am not an expert
on Pohnpei, so feel free to add/subtract/correct any of the information I have here.
Under Geography:
Type in: Pohnpei State incorporates Pohnpei Island, a large volcanic
island with eight atolls totaling 127 square miles, 25 smaller islands within a barrier
reef, and 137 widely-scattered coral atolls. Pohnpei island is the largest in the FSM, and
has a road around the island extending 49 miles. Pohnpei lies 7� north of the equator,
1,050 miles southeast of Guam and 3,240 miles southwest of Honolulu. Its population is
estimated at 35,000. Normal daytime temperature is 80� F.
Under People:
More than40,000 people live on Pohnpei, although nearly a fourth of these are
immigrants from other nearby islands or foreigners (mostly U.S.) working on the island.
English is almost universally understood, although Pohnpeian is more commonly used between
locals.
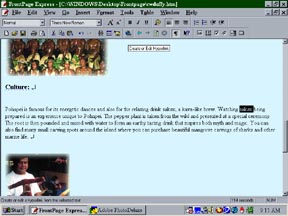
Under Culture:
Pohnpei is famous for its energetic dances and also for the relaxing drink sakau, a
kava-like brew. Watching sakau being prepared is an experience unique to Pohnpei. The
pepper plant is taken from the wild and presented at a special ceremony. The root is then
pounded and mixed with water to form an earthy tasting drink that inspires both myth and
magic. You can also find many small carving spots around the island where you can purchase
beautiful mangrove carvings of sharks and other marine life.
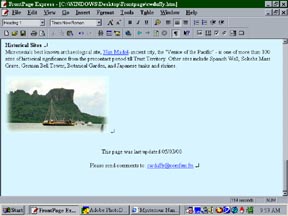
Under Sightseeing:
Micronesia's best known archaeological site, Nan Madol-ancient city, the "Venice of
the Pacific" - is one of more than 100 sites of historical significance from the
precontact period till Trust Territory. Other sites include Spanish Wall, Sokehs Mass
Grave, German Bell Tower, Botanical Garden, and Japanese tanks and shrines.
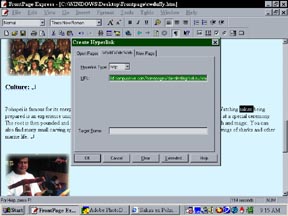
Step 22 Hyperlinks: We are
going to make two hyperlinks on our page. One to a website about Sakau and another to a
website about Nanmadol.
1. Highlight the word Sakau under the information about Culture.
2. Click on that symbol at the top of the tool bar that looks like the Earth with a
"link".
3. Now in the box that says "URL" type in the web address for the Sakau website.
I already located a website for you about Sakau. You can use this one or another if you
like. I chose Dana Lee Ling's Website: http://ourworld.compuserve.com/homepages/danaleeling/sakau.htm
4. Then click OK. Now the word Sakau is a hyperlink. Once you open your page in the
Internet Explorer Program and you click on the word Sakau, you will go to Dana's website.
5. Repeat steps 1-4, but use the word Nanmadol under Sightseeing and use the URL:
http://www.pats.edu/nanmadol.htm
(What most people do before they begin creating their website is they surf the web
and try to locate sites that they want to link to. They write those down and then they
have them handy when they are ready to make their links.)
Step 23 Timestamp
Type in the words: This page was last updated
Go to Insert, Webbot Component and choose Timestamp. Click OK. Center it as you like.
Step 24 Add a mail to link, so people can email you with questions.
1. Type in: Please send comments to:
2. Click on the Hyperlink icon
3. Click on the World Wide Web tab
4. Under Hyperlink type: choose mailto:
5. In the URL box it should say: mailto:(youraddress)
6. Now your webpage should say something like this: Please send comments to:
mailto:cwduffy@comfsm.fm (with your email address)
7. Let's change the wording so that it reads: Please send comments to cwduffy@comfsm.fm (or your email address)
8. This might seem confusing, but we need to go and look at the HTML Source Code and we
are going to get rid of the words "mailto:"
9. Go up to View and select HTML
10. Scroll down to the bottom of the page and find the words Mailto:youraddress.

11. Delete the word "mailto:" and leave your address
there.
12. Click OK.
13. Now you page should look like this
14. Now you have completed your page. If you want to make sure that your hyperlinks
work. Then save and close your file. Open up the Internet Explorer program and then open
up your file.